Select Internet Address
Select the Internet Address for the Network Interface
If you choose to copy the Internet addresses to the new computer, a question arises when a computer has more than one network interface connection (NIC). In this case you need to tell U-Move which NIC on the destination computer should receive the Internet address from the NIC on the source computer.
If the both computers have only one NIC (and they are configured the same way), U-Move will omit the question and simply copy the Internet address from the old NIC to the new NIC.
How to Respond
Click on the dropbox to see a list of Internet addresses on the source computer. Select the Internet address that should be assigned to the NIC on the destination computer.
If you do not wish to change the NICs IP address, select Leave IP address unchanged. You can later use these NICs by assigning an Internet address manually after you finish moving Active Directory.
If you are unsure how to respond, you can review the Internet address assignment for each NIC using the console command Ipconfig (see below).
How to run Ipconfig to review the NIC Internet Addresses
- On the destination computer open a command console window.
- In the console command window, type ipconfig and press the Enter key. The name of each available NIC will be displayed, along with its currently assigned Internet Address.
- Use the displayed information to decide which NIC on the destination should be receive the new Internet address from the source computer.
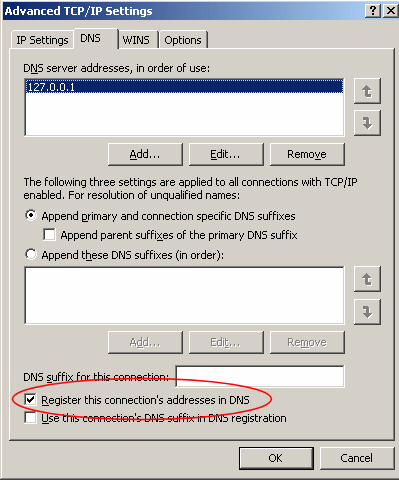
Register the connection's addresses in DNS (Recommended)
Check the box Register this connection's addresses in DNS for all NICs that serve Active Directory. This typically includes all NICs that are connected to your LAN. When the box is checked, the domain controller will attempt to register its SRV records with DNS at startup time so that other DCs and client computers can locate it.

If you do not check the box, you will need to manually add the DNS records to the DNS server yourself. This is tedious and error prone and is not recommended. We recommend that you check the box to allow the domain controller to register its DNS records automatically. Otherwise the other computers on the network might not be able to locate the destination computer in Active Directory, replication might fail, and users might not be able to log on.
U-Move will display a warning message if the source computer was configured to register its DNS records in DNS, but the destination computer was not. To stop the warning message, check the box to Register this connection's addresses in DNS (see above). Then quit and re-start U-Move.
For more information
| U-Move for Active Directory |
